How to troubleshoot a cooler evaporator that is not cooling properly?
As a seasoned supplier of cooler evaporators, I've encountered numerous situations where customers face issues with their evaporators not cooling as expected. In this blog post, I'll share some comprehensive troubleshooting steps to help you diagnose and potentially resolve these problems.
1. Check the Power Supply
The first and most basic step is to ensure that the cooler evaporator is receiving adequate power. A loose connection, a blown fuse, or a tripped circuit breaker can all disrupt the power supply. Start by inspecting the power cord for any visible damage, such as fraying or cuts. If the cord appears to be in good condition, check the electrical outlet by plugging in another device to confirm that it's working.
If the outlet is functioning, examine the fuse box or circuit breaker panel. Look for any blown fuses or tripped breakers and replace or reset them as necessary. Sometimes, a simple power interruption can cause the evaporator to malfunction, so this step can often resolve the issue quickly.
2. Examine the Refrigerant Levels
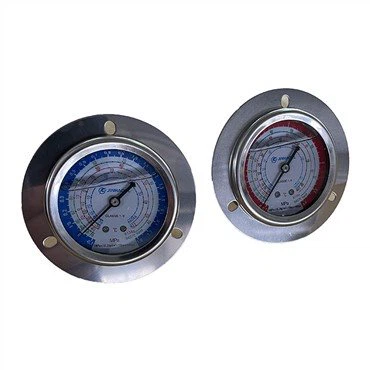
Refrigerant is the lifeblood of any cooling system, including cooler evaporators. Low refrigerant levels can significantly reduce the cooling capacity of the evaporator. There are several signs that may indicate low refrigerant, such as ice buildup on the evaporator coils, warm air blowing from the vents, or unusual hissing sounds coming from the system.
However, checking and refilling refrigerant is a task that should be handled by a qualified technician. Refrigerants are environmentally sensitive substances, and improper handling can lead to safety hazards and environmental damage. If you suspect low refrigerant levels, it's best to contact a professional who has the necessary equipment and expertise to accurately measure and recharge the refrigerant.
3. Inspect the Evaporator Coils
The evaporator coils play a crucial role in the cooling process. Over time, these coils can become dirty or blocked, which restricts the flow of air and reduces the efficiency of the evaporator. To inspect the coils, you'll need to access the evaporator unit. This may require removing a panel or grille, depending on the design of your cooler.
Once you have access to the coils, look for any signs of dirt, dust, or debris. If the coils are dirty, you can clean them using a soft brush or a coil cleaning solution. Gently brush away the dirt and then rinse the coils with water. Be careful not to damage the delicate fins of the coils during the cleaning process.
In addition to dirt, ice buildup on the coils can also be a problem. Ice can form when the airflow over the coils is restricted or when the refrigerant is not flowing properly. If you notice ice on the coils, turn off the cooler and allow the ice to melt naturally. Once the ice has melted, you can then proceed to identify and address the underlying cause of the ice buildup.
4. Check the Airflow
Proper airflow is essential for the efficient operation of the cooler evaporator. A blocked or restricted airflow can prevent the evaporator from effectively cooling the air. There are several components that can affect airflow, including the air filter, the blower motor, and the ductwork.
The air filter is designed to trap dirt and debris, but over time, it can become clogged, reducing the airflow. Check the air filter regularly and replace it if it's dirty. A dirty air filter not only reduces the cooling efficiency but also increases the energy consumption of the system.
The blower motor is responsible for circulating the air through the evaporator and into the space being cooled. If the blower motor is not working properly, it can cause poor airflow. Listen for any unusual noises coming from the blower motor, such as grinding or rattling sounds. If you suspect a problem with the blower motor, it's best to have it inspected and repaired by a professional.
The ductwork also plays a crucial role in airflow. Check the ductwork for any leaks, blockages, or kinks. Leaky ducts can allow conditioned air to escape, while blockages or kinks can restrict the airflow. Seal any leaks in the ductwork using duct tape or mastic sealant, and remove any blockages or straighten out any kinks.
5. Evaluate the Thermostat
The thermostat is the control center of the cooling system. It regulates the temperature by turning the cooler on and off as needed. If the thermostat is not working correctly, it can cause the evaporator to operate inefficiently or not at all.
To check the thermostat, set it to a lower temperature than the current room temperature and listen for the cooler to turn on. If the cooler doesn't turn on, the thermostat may be malfunctioning. You can try replacing the batteries in the thermostat if it's a battery-powered model. If the problem persists, it's advisable to have the thermostat tested and replaced by a professional.
6. Review the System Controls
Modern cooler evaporators often come with a variety of controls and settings that can affect the cooling performance. Make sure that all the controls are set correctly. For example, the fan speed setting can impact the airflow and the cooling capacity. If the fan speed is set too low, it may not be circulating enough air through the evaporator.


Additionally, check the temperature settings on the cooler. Make sure that the desired temperature is set appropriately for the application. If the temperature is set too high, the cooler may not provide sufficient cooling.
7. Consider the Installation and Location
The installation and location of the cooler evaporator can also have an impact on its performance. If the evaporator is installed in a location that is too hot or too humid, it may struggle to maintain the desired temperature. Similarly, if the unit is installed in a cramped space with poor ventilation, it can restrict the airflow and reduce the cooling efficiency.
Ensure that the cooler evaporator is installed in a well-ventilated area away from heat sources such as direct sunlight, heaters, or other equipment that generates heat. Also, make sure that there is enough clearance around the unit for proper airflow.
Conclusion
Troubleshooting a cooler evaporator that is not cooling properly requires a systematic approach. By following the steps outlined in this blog post, you can identify and potentially resolve many common issues. However, if you're still experiencing problems after attempting these troubleshooting steps, it's recommended to seek the assistance of a professional technician.
At [Our Company], we are a leading supplier of high-quality cooler evaporators, including the Evaporator System, Dual Discharge Air Cooler, and Cold Storage Evaporator. Our products are designed to provide reliable and efficient cooling solutions for a wide range of applications.
If you're in the market for a new cooler evaporator or need assistance with troubleshooting your existing system, we'd be happy to help. Contact us today to discuss your requirements and explore how our products can meet your needs.
References
- ASHRAE Handbook - Refrigeration. American Society of Heating, Refrigerating and Air-Conditioning Engineers.
- Cooling System Troubleshooting Guide. Manufacturer's Manual.