Hey there! As a supplier of Water Cooled Chillers, I've had my fair share of experiences with these amazing machines. One crucial part of maintaining and optimizing a water cooled chiller is adjusting the expansion valve. In this blog, I'll walk you through how to do just that.
Understanding the Expansion Valve in a Water Cooled Chiller
First things first, let's talk about what the expansion valve does. In a water cooled chiller, the expansion valve is like the traffic cop of the refrigerant flow. It controls the amount of refrigerant that enters the evaporator. By doing so, it helps maintain the right temperature and pressure levels inside the chiller.
There are different types of expansion valves, but the most common ones in water cooled chillers are thermostatic expansion valves (TXV) and electronic expansion valves (EEV). TXVs use a thermal bulb to sense the temperature of the refrigerant leaving the evaporator and adjust the valve opening accordingly. EEVs, on the other hand, are more advanced and use electronic sensors and controllers to regulate the refrigerant flow.
Why Adjusting the Expansion Valve is Important
Proper adjustment of the expansion valve is crucial for the efficient operation of your water cooled chiller. If the valve is not adjusted correctly, it can lead to a whole bunch of problems. For example, if the valve is allowing too much refrigerant into the evaporator, it can cause the evaporator to flood, leading to poor cooling performance and potential damage to the compressor. On the other hand, if the valve is restricting the refrigerant flow too much, the evaporator may not be able to absorb enough heat, resulting in low cooling capacity and increased energy consumption.
Tools You'll Need
Before you start adjusting the expansion valve, you'll need a few tools. Here's a list of the essentials:
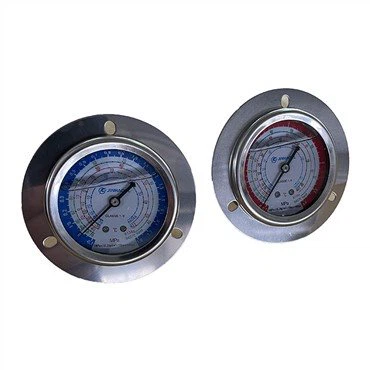
- Pressure gauges: These are used to measure the pressure of the refrigerant in the chiller's system. You'll need both high-pressure and low-pressure gauges.
- Temperature sensors: To accurately measure the temperature of the refrigerant at different points in the system.
- A screwdriver or wrench: Depending on the type of expansion valve, you'll need the appropriate tool to make the adjustments.
- A refrigerant scale: This is used to measure the amount of refrigerant being added or removed from the system.
Steps to Adjust the Expansion Valve
Now, let's get into the nitty-gritty of adjusting the expansion valve. Here are the general steps you can follow:
Step 1: Gather Information
Before you start making any adjustments, it's important to gather some information about your water cooled chiller. This includes the manufacturer's specifications, the type of refrigerant being used, and the recommended operating conditions. You can usually find this information in the chiller's manual or on the manufacturer's website.
Step 2: Check the System Conditions
Make sure the chiller is operating under normal conditions. Check the temperature and pressure readings of the refrigerant in the system. Compare these readings to the manufacturer's specifications to see if the system is operating within the recommended range.
Step 3: Locate the Expansion Valve
The expansion valve is usually located between the condenser and the evaporator. It's a small, cylindrical device with a valve stem and a thermal bulb or electronic sensor attached to it.


Step 4: Make Initial Adjustments
If you're using a TXV, you can make initial adjustments by turning the adjustment screw on the valve stem. Turning the screw clockwise will decrease the refrigerant flow, while turning it counterclockwise will increase the flow. Make small adjustments and wait a few minutes for the system to stabilize before taking new readings.
If you're using an EEV, you'll need to access the electronic controller and make adjustments using the menu options. Follow the manufacturer's instructions carefully to ensure you're making the correct adjustments.
Step 5: Monitor the System
After making the adjustments, monitor the system closely. Check the temperature and pressure readings again to see if they've changed. Look for any signs of improvement in the cooling performance, such as lower discharge temperatures and higher suction pressures.
Step 6: Fine-Tune the Adjustments
Based on the readings and the performance of the system, you may need to make further adjustments. Keep making small changes and monitoring the system until you achieve the desired operating conditions.
Step 7: Check the Superheat
Superheat is the difference between the actual temperature of the refrigerant vapor leaving the evaporator and its saturation temperature at the same pressure. It's an important parameter to monitor when adjusting the expansion valve. Most manufacturers recommend a specific superheat value for their chillers. Use your temperature sensors and pressure gauges to measure the superheat and adjust the expansion valve accordingly to achieve the target superheat.
Common Problems and Solutions
During the adjustment process, you may encounter some common problems. Here are a few of them and their solutions:
Problem 1: High Superheat
If the superheat is too high, it means the expansion valve is restricting the refrigerant flow too much. To fix this, you can try increasing the refrigerant flow by turning the adjustment screw counterclockwise (for TXVs) or adjusting the electronic controller settings (for EEVs).
Problem 2: Low Superheat
A low superheat indicates that the expansion valve is allowing too much refrigerant into the evaporator. To correct this, decrease the refrigerant flow by turning the adjustment screw clockwise (for TXVs) or making the appropriate changes to the electronic controller (for EEVs).
Problem 3: Fluctuating Pressures and Temperatures
If you notice that the pressures and temperatures in the system are fluctuating, it could be a sign of a problem with the expansion valve or other components in the system. Check for any leaks, blockages, or malfunctions in the refrigerant lines, valves, or sensors. Make sure all the connections are tight and the system is properly charged with refrigerant.
Conclusion
Adjusting the expansion valve in a water cooled chiller is an important task that can significantly improve the efficiency and performance of your chiller. By following the steps outlined in this blog and using the right tools, you can ensure that your chiller is operating at its best.
If you're in the market for a new Water Cooled Water Chiller, Water Cooled Screw Chiller, or Water Cooled Chiller, or if you have any questions about chiller maintenance and adjustment, don't hesitate to reach out. We're here to help you find the right solution for your needs.
References
- ASHRAE Handbook of Refrigeration
- Manufacturer's manuals for water cooled chillers